The Expiry extension marks a selected item as ‘expired’ after a certain period of time. This marking can be cancelled at any time. Expiry is the ideal basis for an archiving system. Obsolete articles can be moved to an archive namespace after a query.
Setting an expiration date

To set the expiration date for an article:
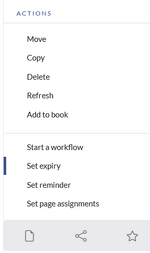
- Click Set expiry in the page tools.
- Enter an expiration date. It could be today or any day in the future.
- Enter an expiration comment (optional).
- Click Done
When the expiration date is reached, the page shows the expiration marker "expired" in the title area. Additionally a watermark is shown on the article by default.
Unexpiring a page
To remove the expiration marker from an article, you can either click the drop-down arrow next to the "expired"-marker in the title area and unexpire the page, or click on the Manage expiry button in the page tools.

Overview about the expiring pages
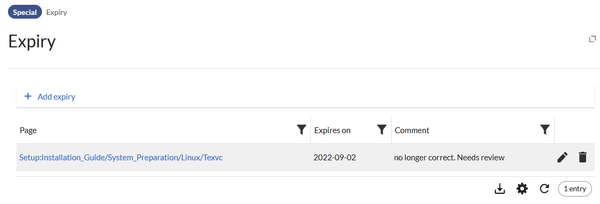
List of all pages with expiry date
To view all pages that have an expiration date, you can go to Global settings > Editing > Expired pages or open navigate to Special:Expiry
From there, users can edit or remove the expiration marker of any page.

Archiving obsolete pages
Administrators can create an Archive namespace if obsolete pages should be archived rather than deleted. Users can then move outdated articles to this namespace.
Expiration log
Administrators can view a log with all expiration activities from the page Special:Log.
- Select the log type Expiry from the first drop-down menu.
- Click Show.
Configuration
You can set the following options in the Config manager.
Additionally, the display of the expiry status can be moved after the page content in the Config manager.